Summary: We have analyzed the development principle of ARKit in detail before. In this article, we will talk about the other practical tool ARCore in the live broadcast scenario.
In fact, I have been paying attention to ARCore for a long time, but I have not spared time to write a summary. Just in response to a friend's appointment, let's talk about ARCore today.
I don't talk much about the history of ARCore and the competition with Apple ARKit. You can find a bunch of information online. But there is really not much to explain ARCore on the Internet.
This article has two main purposes. One is to introduce you to the basic concepts of ARCore. Understanding these concepts is crucial for everyone to learn ARCore in depth. The second is to deeply analyze the working mechanism of ARCore, which will make it easier for everyone to understand ARCore.
In addition, ARCore is very close to the basic concept of ARKit. As long as you understand one of them, you basically have another one.
The basic concept of ARCore
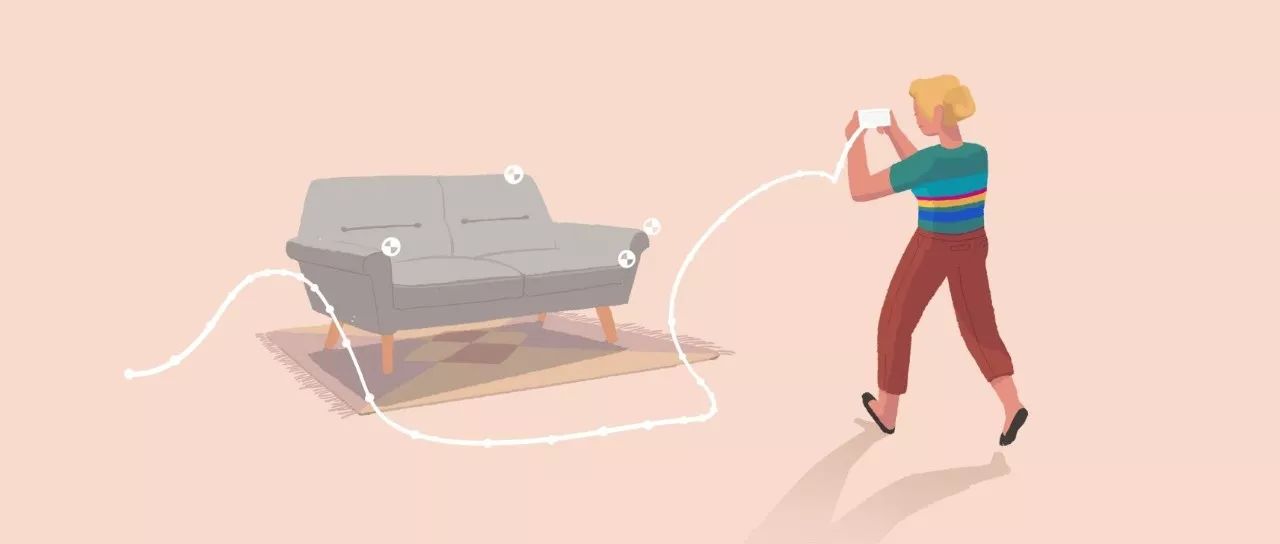
ARCore has two things to do when working, first tracking the trajectory of the phone and then building its understanding of the real world.
ARCore's motion tracking technology identifies feature points through the Camera and tracks how these feature points move over time. Through the motion data of these feature points and the information read from the inertial sensor of the mobile phone, ARCore calculates the position and direction of the mobile phone movement and calls it a gesture.
In addition to identifying these feature points, ARCore can detect flat information such as floors and desktops as well as light intensity somewhere. This information allows ARCore to build a real world of its own understanding. After building such a model, you can place some virtual content on it.
How does ARCore do it? It uses three key technologies to integrate virtual content with the real world:
Motion tracking
Environmental understanding
Light assessment
Motion tracking
ARCore can know when the phone is moving, relative to the location and orientation (posture) of the real world phone.
When the phone moves in the real world, ARCore uses a process called concurrent ranging and mapping to understand the relative position of the phone to the world around it.
ARCore can detect visually different features of the images captured by Camera, called feature points. It uses these points to calculate its positional change. Over time, ARCore can estimate the pose (position and orientation) of the Camera relative to the real world through visual information and inertial measurements from IMU equipment.
By aligning the rendered 3D virtual content with the physical Camera's pose, developers can render virtual content from the right perspective. By rendering the image of the virtual item onto the image obtained from Camera, it looks like the virtual content is part of the real world.
Environmental understanding

ARCore allows the phone to detect the position and size of a horizontal plane. Such as the ground, tables, bookshelves, and so on. This allows the virtual object to be placed on the detected horizontal plane.
How is it done? ARCore continuously improves its understanding of the real world environment by detecting feature points and planes.
ARCore will look for clusters of feature points on common horizontal surfaces such as desktops. In addition, ARCore can determine the boundaries of each plane and provide the above information to your application. This way, developers can use this information and place virtual objects on a flat surface.
Since ARCore uses feature point detection planes, flat surfaces with no texture (such as white desktops) may not be detected correctly.
Light assessment

User interaction
ARCore uses the hit testing (hit test) to get the (x,y) coordinates corresponding to the phone screen (such as by clicking on the screen, etc.), projecting it into the Camera's 3D coordinate system, and returning to the hit point ray. All planes and feature points, as well as the pose of the intersection in the world coordinate system. This allows users to interact with objects in the ARCore environment.
Anchor and tracking
ARCore can change its understanding of its position and environment to adjust posture. If we want to place a virtual object in the ARCore environment, we first need to determine an anchor point to ensure that ARCore can keep track of the location of the object over time. Normally, an anchor point is created based on the pose returned by the hit test.
This technique of posture change is especially critical. Only when posture is obtained, ARCore can continuously update the position of environmental objects (like airplanes and feature points) over time. ARCore considers planes and points to be special types of objects that can be tracked. You can anchor virtual objects to these traceable objects to ensure a stable relationship between virtual objects and trackable objects as the device moves. It's like you put a virtual vase on your desktop, and if ARCore later adjusts the pose associated with the desktop, the vase will remain on the desktop.
ARCore core class introduction
Session
In the com.google.ar.core.Session class, the Session manages the state of the AR system and handles the Session lifecycle. This class is the main entry point for the ARCore API. This class allows users to create Sessions, configure Sessions, start/stop Sessions, and most importantly receive video frames to allow access to Camera images and device gestures.
Config
The com.google.ar.core.Config class is used to save the settings of the Session.
Frame
The com.google.ar.core.Frame class, which gets state information and updates the AR system by calling the update() method.
HitResult
The com.google.ar.core.HitResult class, which defines the intersection between the hit point ray and the estimated true geometric world.
Point
The com.google.ar.core.Point class, which represents the space point that ARCore is tracking. It is the result of when an anchor is created (the createAnchor method is called) or when a hit is detected (the hitTest method is called).
PointCloud
The com.google.ar.core.PointCloud class, which contains a set of observed 3D points and confidence values.
Plane
The com.google.ar.core.Plane class describes the latest information on the real world's flat surface.
Anchor
The com.google.ar.core.Anchor class describes the fixed position and orientation in the real world. In order to maintain a fixed position of the physical space, the digital description of this location will be updated as ARCore's understanding of the space continues to improve.
Pose
The com.google.ar.core.Pose class, which represents a transformation from one coordinate space to another. In all ARCore APIs, gestures always describe the transformation from the object's local coordinate space to the world's coordinate space.
As ARCore's understanding of the environment changes, it will adjust the coordinate system mode to be consistent with the real world. At this point, the position (coordinates) of the Camera and anchor points may change significantly so that the objects they represent handle the proper position.
This means that each frame of image should be considered to be in a completely independent world coordinate space. Anchor and Camera coordinates should not be used outside of the rendered frame. If you need to consider a location beyond the scope of a single render frame, you should create an anchor point or use a location relative to the existing anchor point nearby.
ImageMetadata
The com.google.ar.core.ImageMetadata class provides access to metadata for Camera image capture results.
LightEstimate
com.google.ar.core.LightEstimate saves estimates about the lighting of real scenes. Get it by getLightEstimate().
Case Analysis
Some of the sample programs are included in the ARCore SDK released by Google. With the basic knowledge above, it is easy to understand the flow of the Demo program he wrote.
Create Session and Conig
Creating a Session and Config in the onCreate method in the Activity is a good place.
mSession = new Session(/*context=*/this);mDefaultConfig = Config.createDefaultConfig();if (!mSession.isSupported(mDefaultConfig)) { Toast.makeText(this, "This device does not support AR", Toast. LENGTH_LONG).show(); finish(); return;}
Session: is the management class of ARCore, it is very important. ARCore's opening, closing, video frame acquisition, etc. are all managed through it.
Config: Stores some configuration information, such as the plane search mode, lighting mode and other information are recorded in this class. The class is still relatively simple, and there are not many things left.
isSupported: This method mainly controls the version and model of the SDK. At present, the official only supports several Google and Samsung machines for testing. Other models do not support ARCore, of course, some models can use ARCore through the cracked SDK. The Config parameter in this method is not used.
Create GLSurfaceView for AR display
In the demo provided by Google, the display part of AR uses GLSurfaceView. Students who do video development know that Android can use three Views for video rendering. They are:
SurfaceView
GLSurfaceView
TextureView
Among them, SurfaceView is the most flexible and efficient, but it is more annoying to use. GLSurfaceView is much simpler than SurfaceView, just need to implement its Render interface. TextureView is the easiest to use, and a lot of work is done by Android's window manager, but the flexibility is relatively poor.
For efficient rendering, Google uses OpenGL technology extensively in Demo. Because OpenGL is a very large field of image processing, it can't be explained clearly by one or two articles. At the same time, it is not the focus of our paper. Therefore, we will not introduce it in detail here. Interested students can learn online.
mSurfaceView = (GLSurfaceView) findViewById(R.id.surfaceview);...mSurfaceView.setPreserveEGLContextOnPause(true);mSurfaceView.setEGLContextClientVersion(2);mSurfaceView.setEGLConfigChooser(8, 8, 8, 8, 16, 0); // Alpha used for plane blending.mSurfaceView.setRenderer(this); mSurfaceView.setRenderMode(GLSurfaceView.RENDERMODE_CONTINUOUSLY);
This code first creates a GLSurfaceView object from the resource file and then associates the GLSurfaceView with the EGL context. And the Activity as the GLSurfaceView callback object (that is, the Activity to implement the interface defined in GLSurfaceView.Renderer, such as onSurfaceCreated, onSurfaceChanged, onDrawFrame, etc.), and finally set the mSurfaceView rendering mode to GLSurfaceView.RENDERMODE_CONTINUOUSLY, that is, the GLSurfaceView continues Rendering.
Create various threads
To understand the content of this section, first of all, we must know what the detailed working principle of AR is. I will give you a brief explanation here.
Background display
Anyone who has used AR knows that AR is putting some virtual items into real scenes. So where does this real scene come from? Of course it is obtained from the camera of the phone.
We take the video we got from Camera as the background of the AR. In fact, AR is to put virtual items on the video, but it is not a simple placement, but requires a lot of calculations to find the plane position in the video and then place it.
The collection of video in Android is relatively simple. Like the live broadcast system, the camera must use this technology.
Platform detection
As we have already said above, AR is a real-time video + virtual item. However, the virtual object cannot be simply placed on the video. Instead, each frame in the video is detected, the plane in the video is found, and the virtual object is placed after the location is determined. This is considered AR:)
Point cloud
As we know above, AR = real-time video + plane + virtual items. In addition, it should be able to track virtual items, that is, you can observe the same item from different angles and get different postures, so there is a "point cloud" technology. So what is a point cloud? As the name suggests, the image is a bunch of points, these shapes are a bit like clouds. Each point in the point cloud is a feature point that is obtained through Camera.
Placing virtual items
We found the plane. With the tracking method, we can put the prepared virtual items on the platform. Now it is the real AR.
Ok, after knowing these basic principles, let's see how Google Demo does it.
Create thread
For each of the above, Demo starts a thread with the following code:
...// Create the texture and pass it to ARCore session to be filled during update().mBackgroundRenderer.createOnGlThread(/*context=*/this);mSession.setCameraTextureName(mBackgroundRenderer.getTextureId());// Prepare the Other rendering objects.try { mVirtualObject.createOnGlThread(/*context=*/this, "andy.obj", "andy.png"); mVirtualObject.setMaterialProperties(0.0f, 3.5f, 1.0f, 6.0f); .. .} catch (IOException e) { Log.e(TAG, "Failed to read obj file");}try { mPlaneRenderer.createOnGlThread(/*context=*/this, "trigrid.png");} catch (IOException e ) { Log.e(TAG, "Failed to read plane texture");}mPointCloud.createOnGlThread(/*context=*/this);...
The above code first creates a background thread that is used to render the video captured from Camera to the screen as the background. Where did the data come from? The Camera data is obtained through Session.update and then passed to the background thread through the texture.
A student who has no concept of texture can imagine it as a memory space.
The virtual item thread is then launched for drawing virtual items, and when the angle changes, the virtual object's posture is updated. The plane thread is then created to draw the plane. Finally, the point cloud thread is started to draw feature points.
At this point, the various threads are created. Let's talk about how to render.
Hit detection and rendering
Hit detection
When we want to draw virtual items to the background, we must first perform a hit test. code show as below:
MotionEvent tap = mQueuedSingleTaps.poll();if (tap != null && frame.getTrackingState() == TrackingState.TRACKING) { for (HitResult hit : frame.hitTest(tap)) { // Check if any plane was hit, And if it was hit inside the plane polygon. if (hit instanceof PlaneHitResult && ((PlaneHitResult) hit).isHitInPolygon()) { // Cap the number of objects created. This avoids overloading both the // rendering system and ARCore. if (mTouches.size() >= 16) { mSession.removeAnchors(Arrays.asList(mTouches.get(0).getAnchor())); mTouches.remove(0); } // Adding an Anchor tells ARCore that it should Track this position in // space. This anchor will be used in PlaneAttachment to place the 3d model // in the correct position relative to the world and to the plane. mTouches.add(new PlaneAttachment( (PlaneHitResult) hit). getPlane(), mSession.addAnchor(hit.getHitPose()))); // Hits are sorted by depth. Consider on Ly closest hit hit a a plane. break; } }}
In the example, does it look for click events and the image is processed in the tracking state? If so, hit it to see if a plane can be found, and if found, create an anchor and bind it to the platform.
Render background
// Draw background.mBackgroundRenderer.draw(frame);
The above code can be used to push the contents of the texture to EGL. The rendering thread created above gets the data from the EGL context and finally renders the video to the screen.
Draw a point cloud
mPointCloud.update(frame.getPointCloud());mPointCloud.draw(frame.getPointCloudPose(), viewmtx, projmtx);
Similarly, through the above code, you can pass data to the point cloud thread for point cloud drawing.
Drawing plane
// Visualize planes.mPlaneRenderer.drawPlanes(mSession.getAllPlanes(), frame.getPose(), projmtx);
The above code is used to pass data to the plane thread for plane drawing.
Draw virtual items
For (PlaneAttachment planeAttachment : mTouches) { if (!planeAttachment.isTracking()) { continue; } // Get the current combined pose of an Anchor and Plane in world space. The Anchor // and Plane poses are updated during calls to session .update() as ARCore refines // its estimate of the world. planeAttachment.getPose().toMatrix(mAnchorMatrix, 0); // Update and draw the model and its shadow. mVirtualObject.updateModelMatrix(mAnchorMatrix, scaleFactor); mVirtualObjectShadow. updateModelMatrix(mAnchorMatrix, scaleFactor);}
Finally, iterate through all the anchor points and draw virtual items on each anchor point.
At this point, our analysis of ARCore has come to an end.
summary
ARCore still has a lot of difficulty compared to beginners. Because there are many new concepts in it that need to be absorbed and absorbed.
On the other hand, ARCore currently only has a few models that can be tested, and these models are not used in China, so for most people, there is no way to experiment, which also increases the difficulty of learning.
In addition to the above two points, ARCore uses a lot of knowledge about OpenGL. And OpenGL is a deep learning, so the difficulty of learning is even more steep.
Through the above three points, it can be said that the current threshold for learning ARCore is much more difficult than Apple's ARKit.
Function description
The socket is ordinary converter,with two output 5V2A power USB power supply at the same time,can be very convenient in use electrical appliances and recharge the equipment at the same time,such as digital products like Iphone Ipad,MP3,MP4 etc.The charge apply to full range of international AC output,no-load power consumption less than 0.3W,with short circuit,overload,over-voltage protection,can be convenient for your life and save more energy
Timer Control Time Adgustment
1.Press the power switch 1 time,the 1HOUR LED will light on.The Timer into ON mode,USB and control socket output ON .
2.Continuously press the power switch the LED light on,the Countdown mode and LED light on will cycle change from 1HR,2HR,4HR,6HR,8HR,10HR.
3.Choose you need countdown time mode,the mode LED will lighto on,start countdown until countdown time finish,the control output and USB change to OFF
4.Then the countdown is start,The Time indicate LED will from high to low auto change until Countdown finish off.
Failure analysis:
1.check whether the power supply connection is good
2.check whether the USB cable is loosen
Warning Note:
1.Use indoor and dry location ONLY
2.The load max does not exceed 15A 3600W
3.This product does not convert voltage please do not miss use DO NOT exceed the maximum loading of 3600 Watts 15A
4.Always have earth connection for safety reason
5.If in doubt please consult with a qualified electrician
USB charger socket, USB socket, USB plug, USB plug socket
NINGBO COWELL ELECTRONICS & TECHNOLOGY CO., LTD , https://www.cowellsocket.com